

BretBeermann
-
Postów
494 -
Dołączył
-
Ostatnia wizyta
Typ zawartości
Nowości
Receptury medalowe
Profile
Forum
Galeria
Pliki
Blogi
Wydarzenia
Sklep
Collections
Giełda
Mapa piwowarów
Odpowiedzi opublikowane przez BretBeermann
-
-
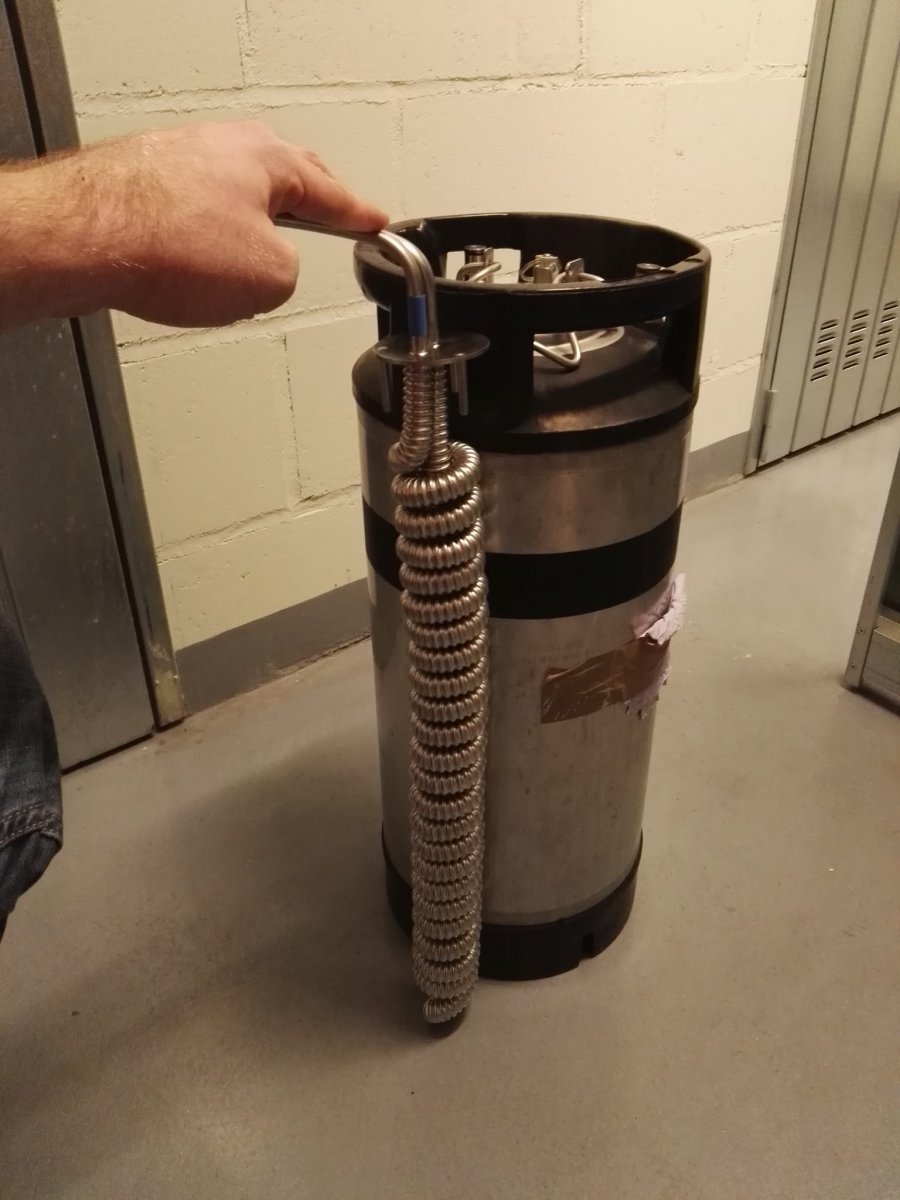
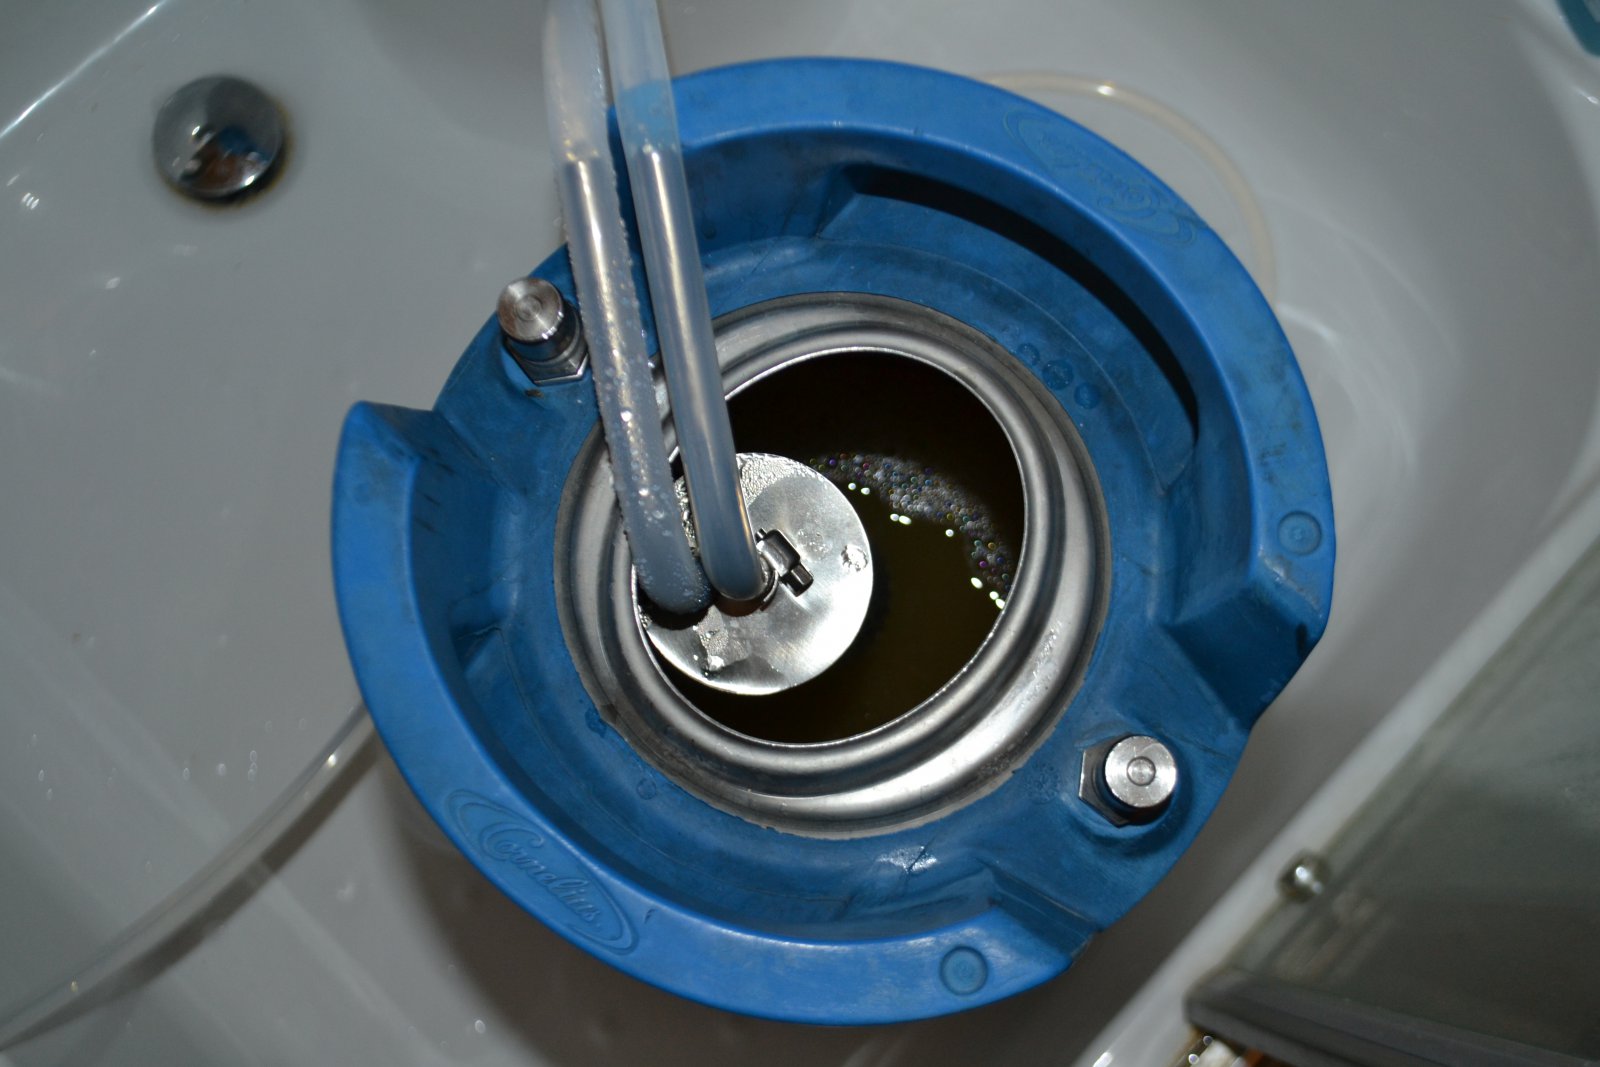
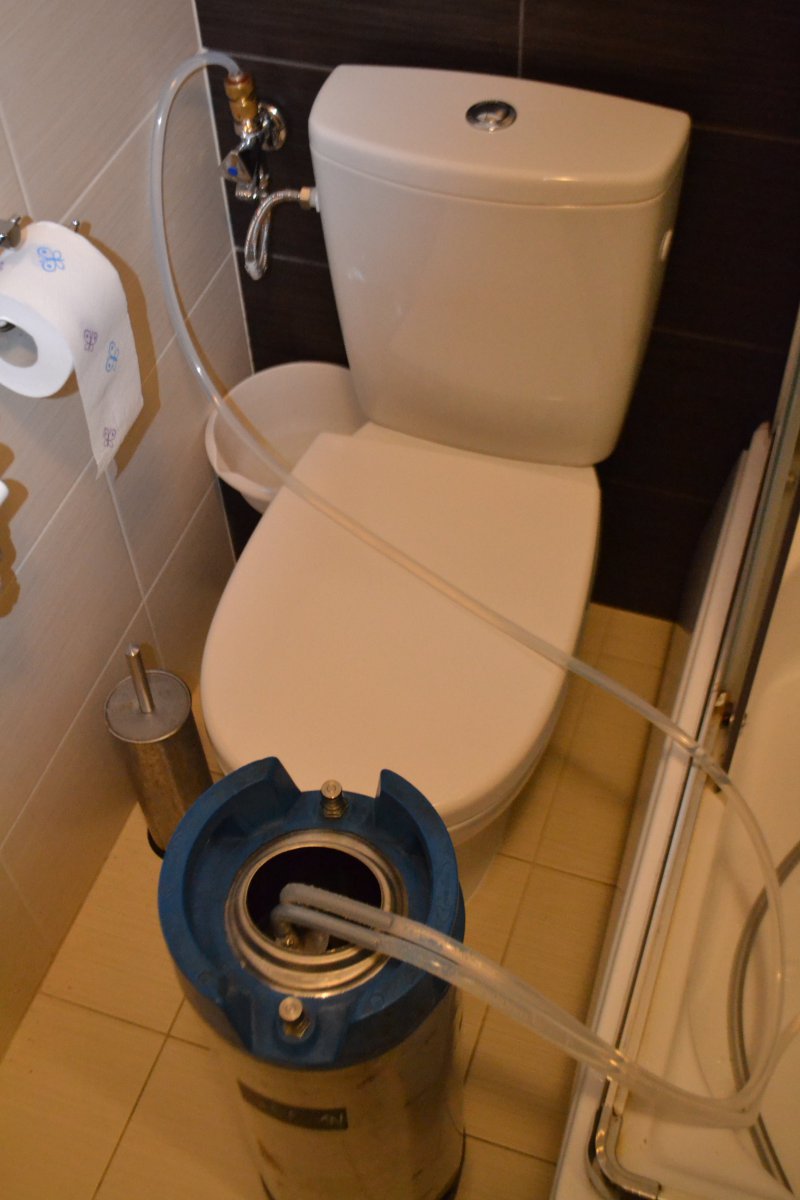
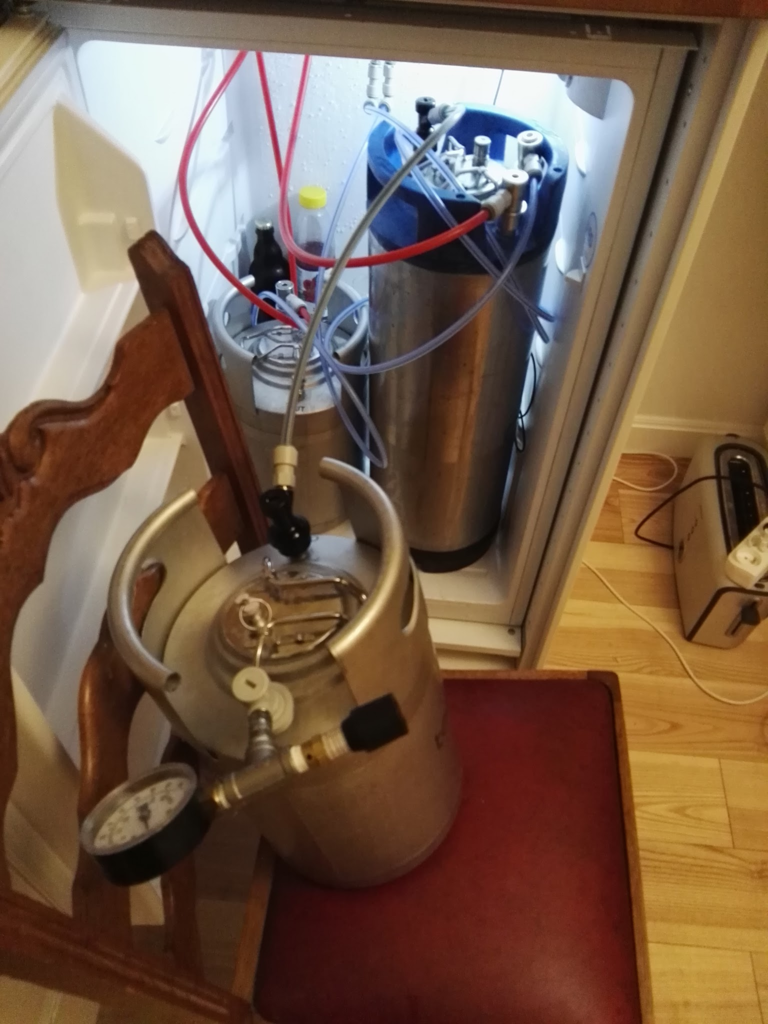
I finally finished my new chiller project. Before I was using a 25 foot copper coil, but I've wanted to do in-keg chilling for a while. I ordered a longer version of what distillers often use and sat on it for a while as I decided how to deal with the water supply in my new apartment.

I eventually got around to replacing my water supply line in the bathroom with a 2-output supply, and added a quick-disconnect so that I could easily hook up the chiller.
After this, I was ready to chill in the keg without much issue. I dump my hot wort into a keg to ferment in, and my sanitized chiller gets to work.
I'm able to chill with the keg in the shower, and if I want I can put the output of hot water directly into the laundry machine.
-
My carbonation cap works with both gas and liquid disconnects, with a little force. Have you tried with the other QD? I primarily use my caps for running sanitizer through lines and my beer gun so I am pressurizing with gas, then swapping to a liquid QD for either of these purposes.
-
I can bring you back some in August if you can wait that long. I usually order from here which has at-cost and reasonable shipping in the region that I stay in:
-
Jak są kegi AEB, mozesz kupić głowice od kolega DAMTRY na piwo.org.
-
-
Czy są kegi AEB? Jak są, kup sobie używaną głowice od kolega DAMTRY na forum.
-
-
Czasami są dobre opcje na allegro/OLX. Ja kupiłem cobra plus (2 kranowy) za 300 zł i wygląda jak nowy. Teraz to jest najlepszy ale jak masz szans poczekac, jest dobry pomysł kup w Polsce.
-
10-12 BLG od tydzien po zabutelkowania jak był zdrowa fermentacja
15 BLG 2-4
-
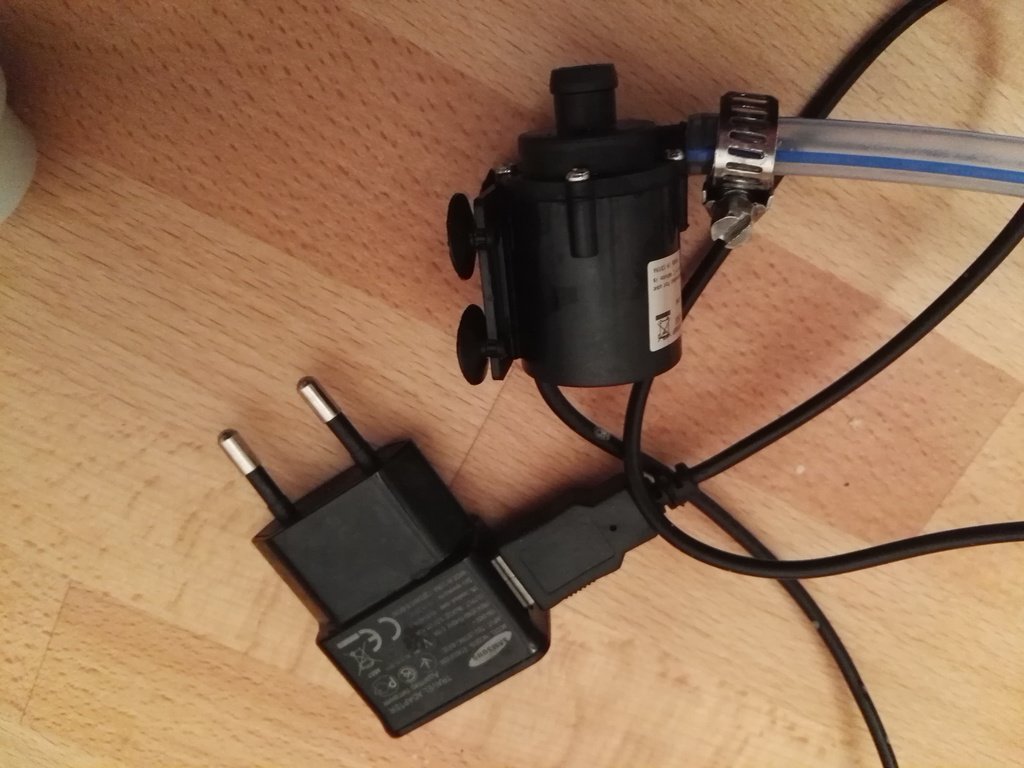
I decided to clean my lines today. My new USB pump (I broke the old one trying to attach some fittings) came in from eBay.
I hooked up my two faucet lines with a jumper from BrewHardware
and cycled OXI through my ball lock spout for my Intertap faucet, down the line and across the jumper, and up the second line and out the other faucet. It is a nice loop, which you can let run as long as you'd like since the fridge is closed during cleaning.
Ran it for a while, then swapped the OXI to water, and replaced the water a few times to flush the line well before swapping to a recirculation of StarSan. Nice freshly cleaned lines ready for my new kegs I transferred into later.
-
Nie można kupić sadzonki amarillo. Dziwne, że mówisz, że masz takie rośliny.
-
-
-
-
American Brown Ale #1
12 L Batch Size
2.5 kg Pilsner Malt (Weyermann)
35 g Black Patent
75 g Pale Chocolate
140 g CaraGold
210 g CaraBohemian
30 g Tettnang for 60 minutes
30 g Willamette for 5 minutes
Starter of Wyeast 1968
Mashed in with 9 L of water to hit 67 C. Mashed for an hour. No-chilled in the keg overnight. Fermented at 20 C.
-
Oatmeal Stout #1
12 L Batch Size
2.35 kg Pilsner Malt (Weyermann)
250 g Flaked Oats
190 g Pale Chocolate
190 g Chocolate
190 g Roasted Barley
30 g East Kent Goldings for 60 minutes
Starter of FM Irish Darkness
Mashed in with 9 L of water to hit 67 C. Mashed for an hour. No-chilled in the keg overnight. Fermented at 20 C
-
Jest pisany na johnguest.com że do +65 C i 10 bar są dobrze, ale jest pisany że może wiecej na inne węzy.
-
Suche drożdże są w optymalnym stanie zdrowia. Bez sensu robić startera bo potem masz więcej ale nia są w optymalnym stanie zdrowia.
-
Korek powinna być mokro, a każdy kąt jest dobrze jak korek jest mokro.
-
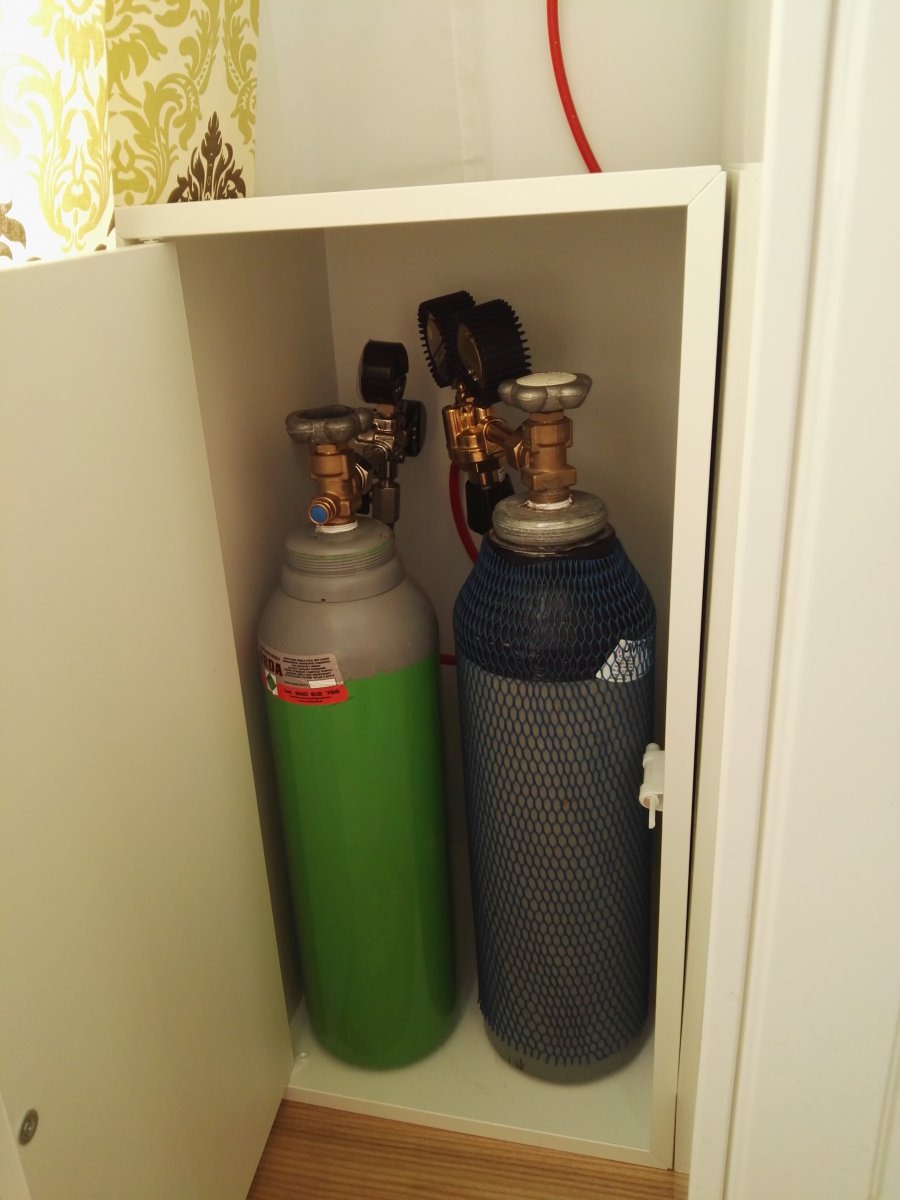
Recently my wife got me a bottle of nitrogen for nitrogen beers and coffee. To have the ability to serve on both nitrogen and CO2, I decided to move my tanks outside of the fridge. To do this I picked up a 35x35x70 cm IKEA EKET cabinet.
http://www.ikea.com/pl/pl/catalog/products/90333938/
It goes together easily without any tools, and I used a blade knife to open a hole in the back for the lines.
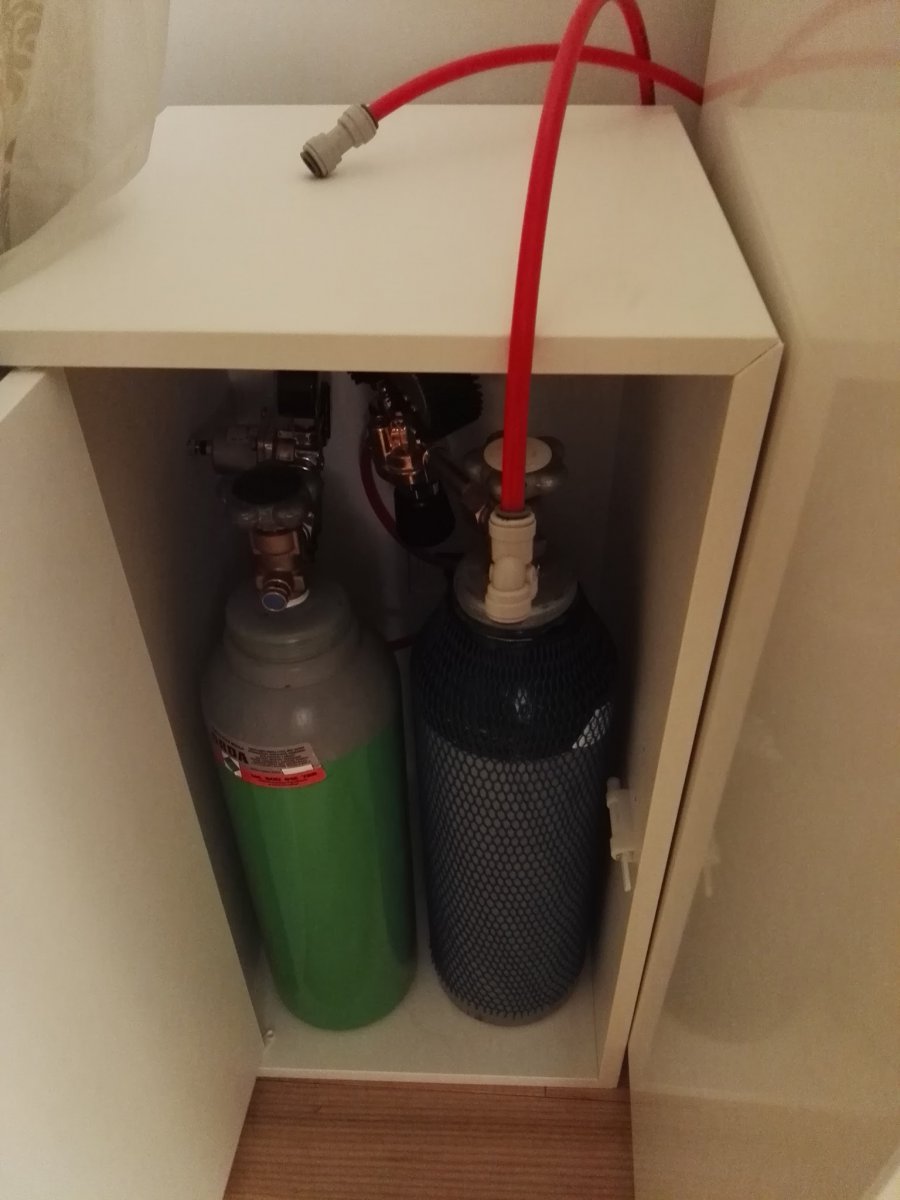
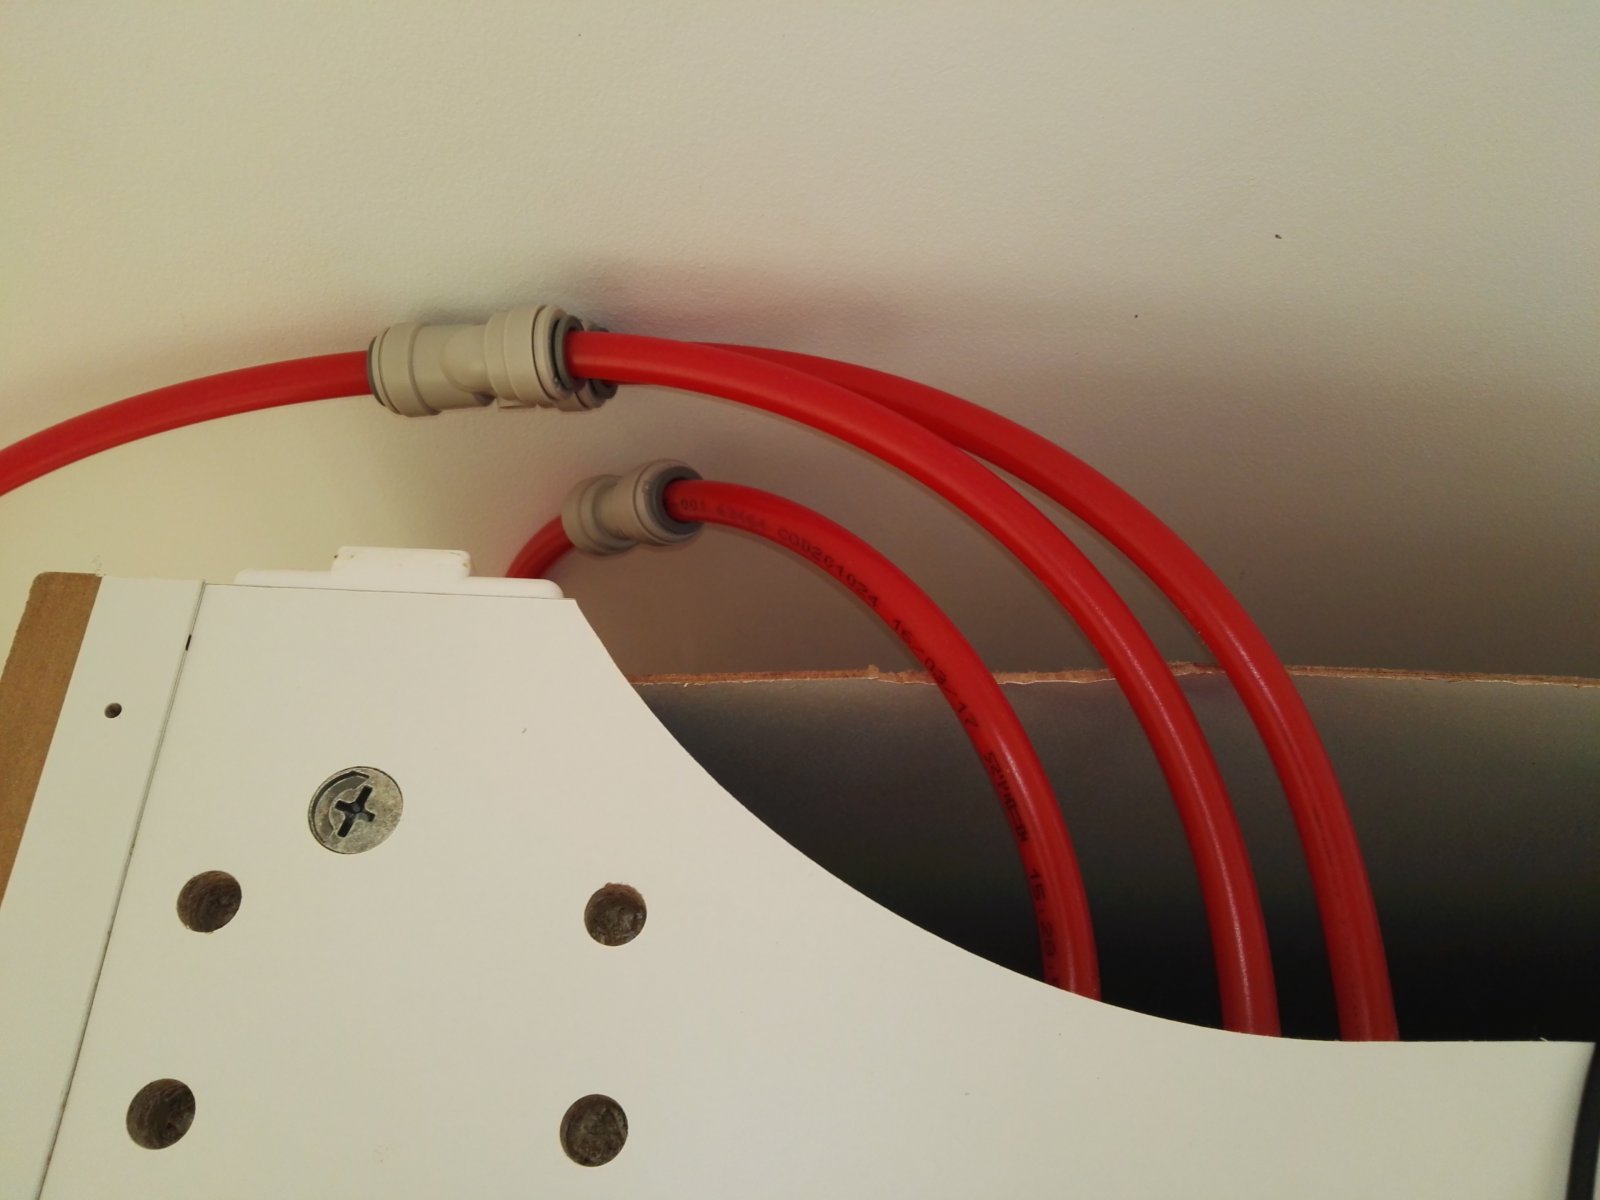
Two tanks with single gauge regulators fit snugly. Lines out the back. I attached a 3/7 by 3/8 John Guest and 3/8 John Guest Tee so I can quickly swap my tanks out without issue.
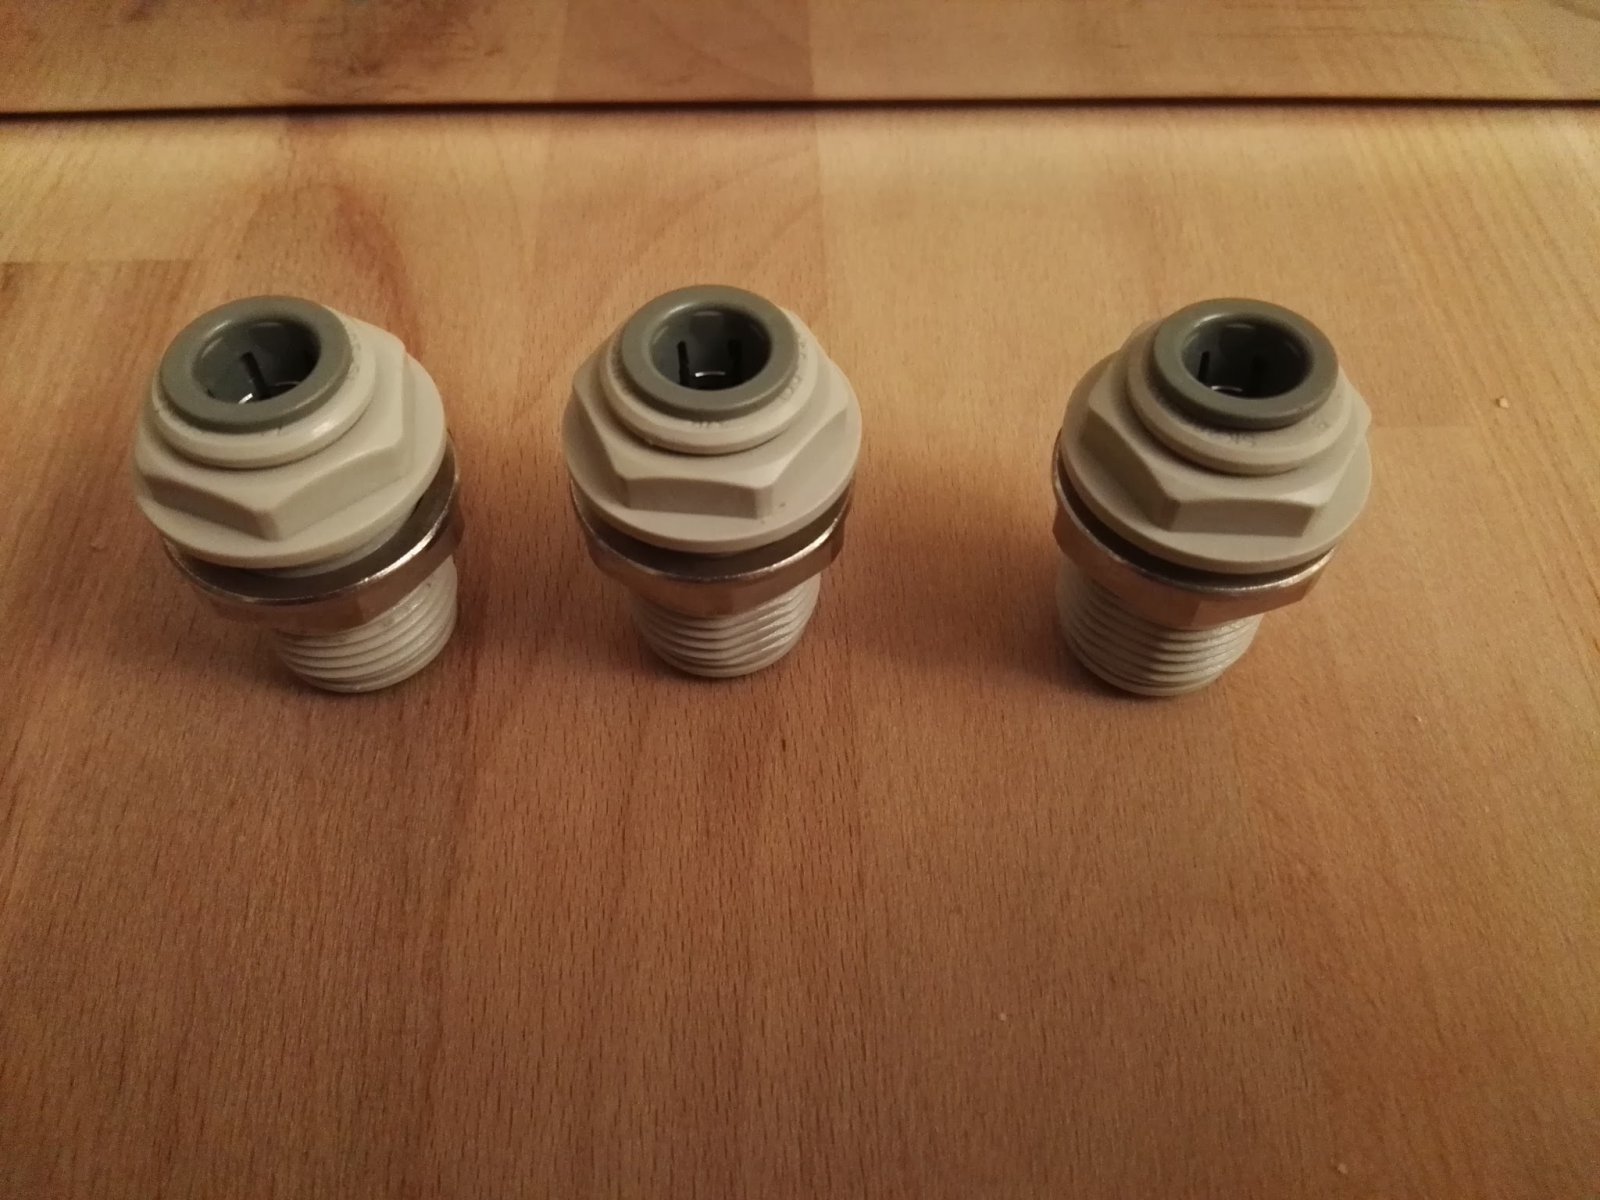
I purchased some 3/8 x 3/8 John Guest bulkheads, thinking initially I would install ball lock fittings inside I realized the strength of the fridge would probably work better with these:
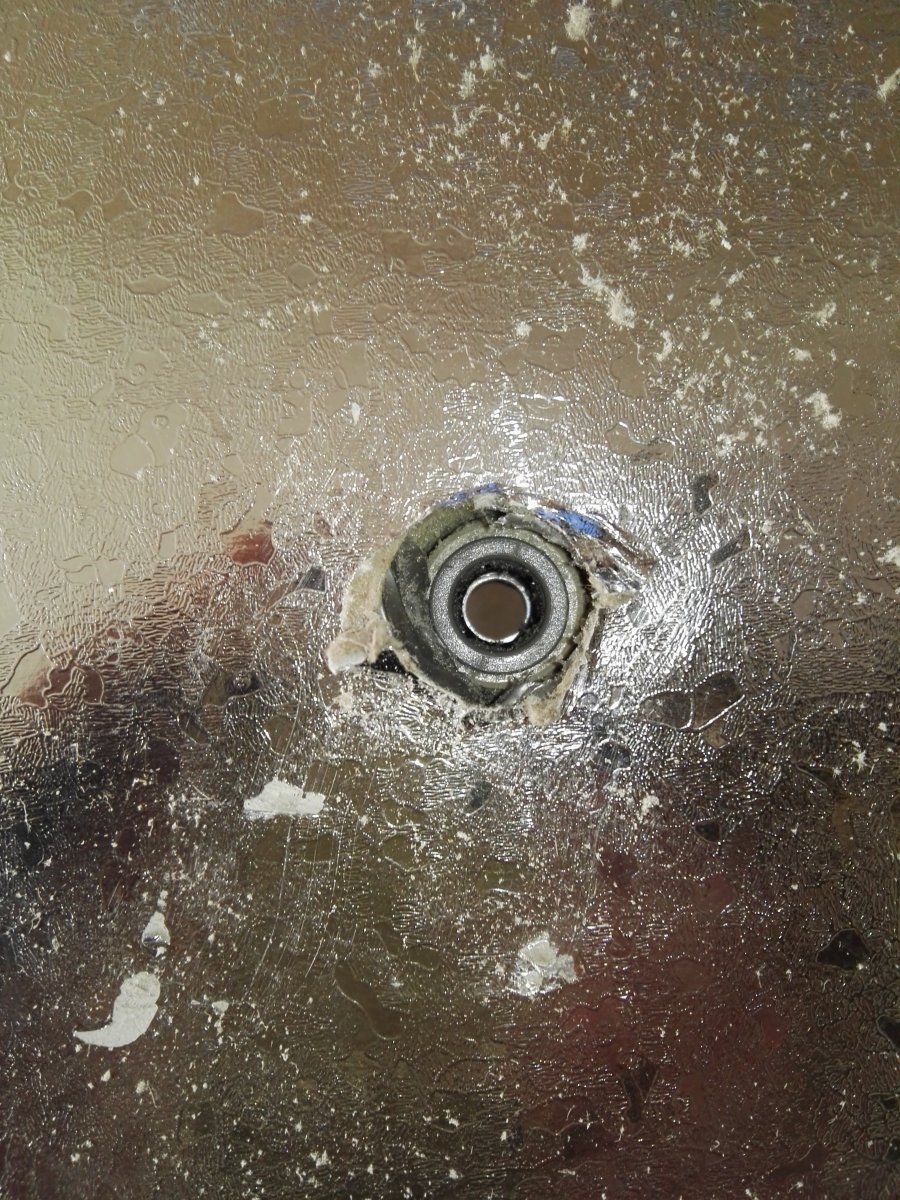
After removing the fridge, I used a 20 mm spade bit to open up holes for the bulkheads. They screwed through the hole perfectly, not sliding in and out but catching with the threading.
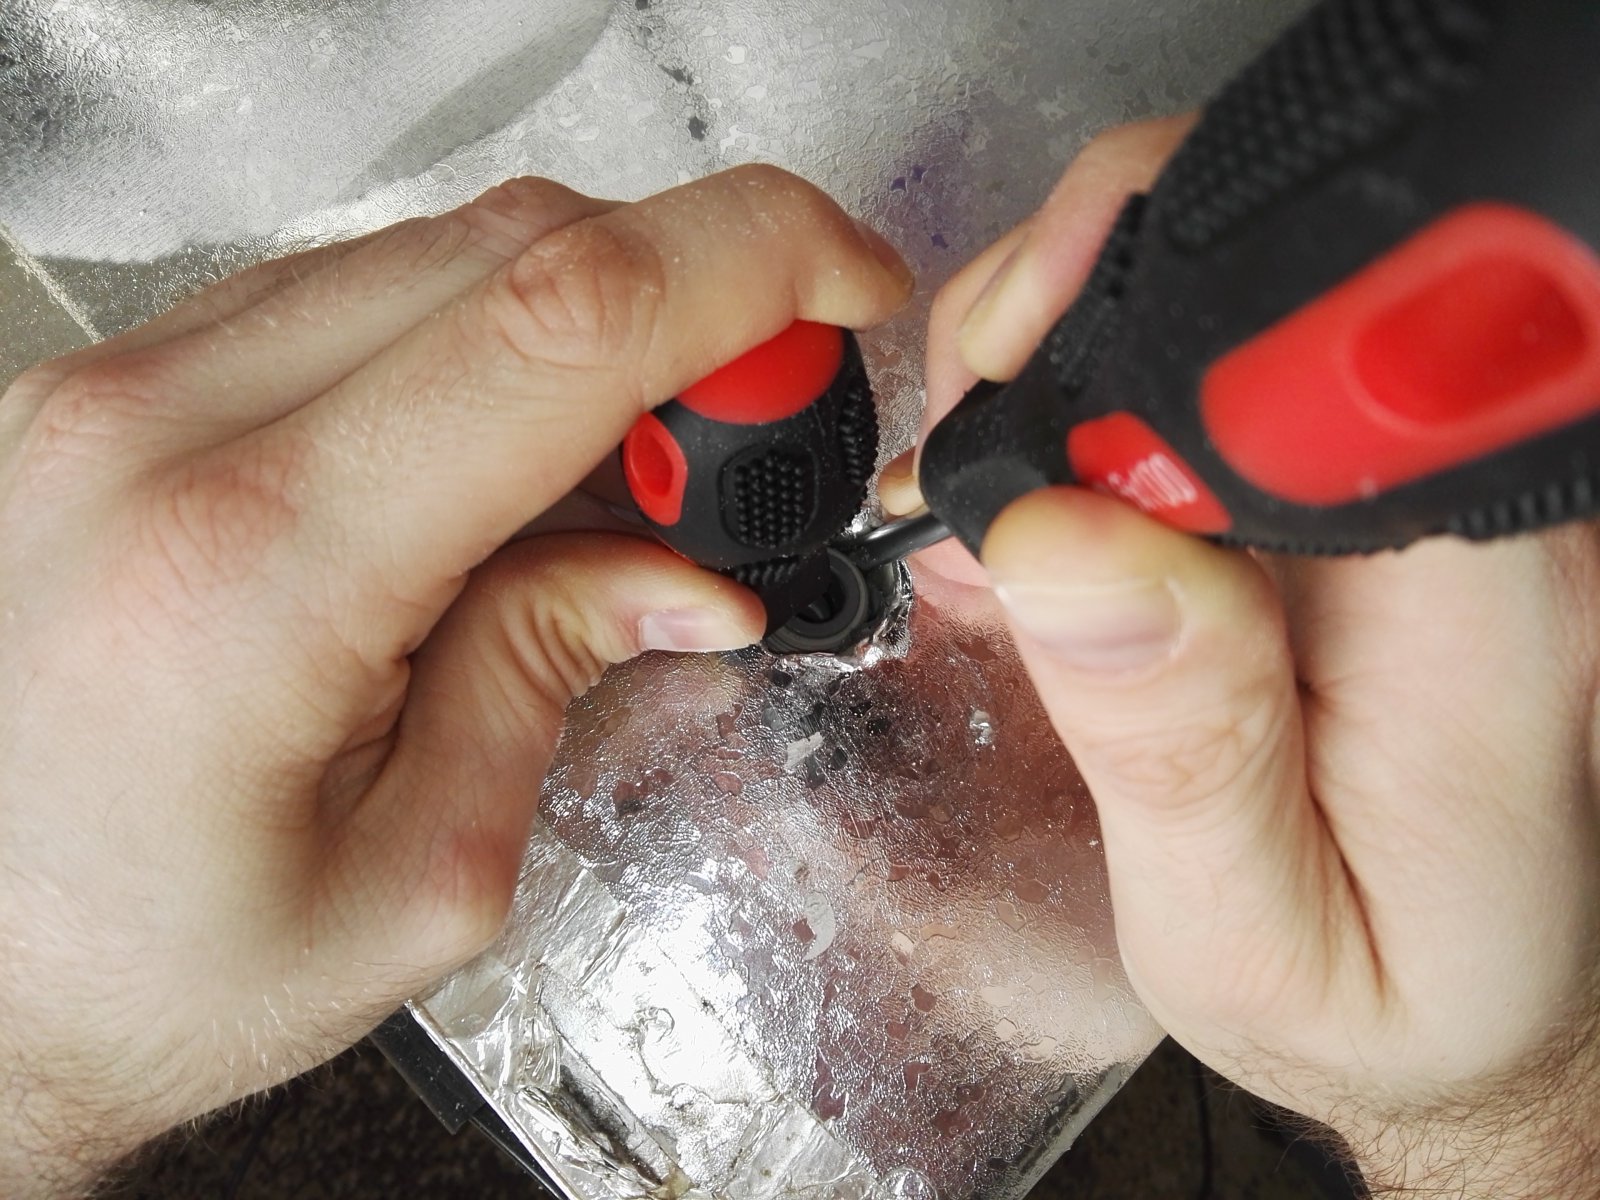
I cut away as little insulation as possible and snugged the nut down to screw into. It took two screwdrivers to hold the nut in place while my wife screwed in the bulkheads from inside the fridge.
Once the bulkheads were installed, I hooked up some small lengths of 3/8 tubing to fit into the fittings shown earlier between the bulkhead and regulator.
I hooked up the fittings and then began putting the kegerator back together.
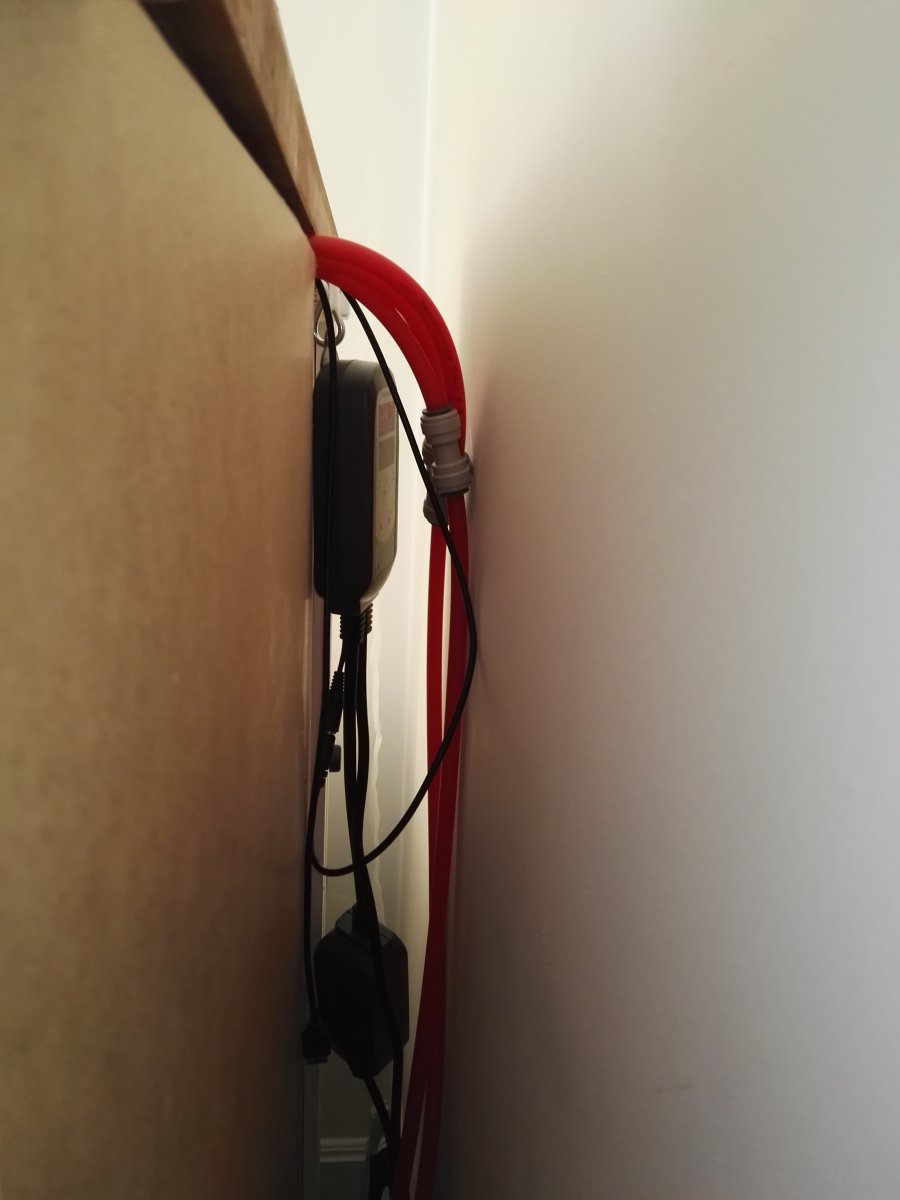
The lines are hidden easily and can't be seen from the front at all.
The gas lines and ITC-308 controller from the back:
Once it was back together I oiled the top since everything was off it and got it ready for my next beer (and soon coffee).
-
-
Używałem stare butelki (po 50 lat) bez problemów.
-
-
W34/70 jest najlepszy dolniak do wysoki temperaturze. Do 16 C jest dobrze, a może więcej. Lepiej używać to niż US-05 albo coś do aleów.


Kapsle do piwa
w Sprzęt
Opublikowano
Używam to:
https://www.amazon.com/gp/product/B0009JQ2JA/ref=oh_aui_search_detailpage?ie=UTF8&psc=1